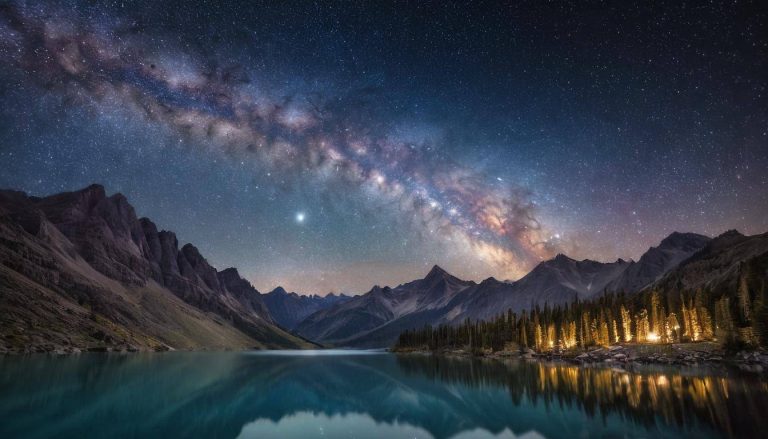

Beginner Nightscape Photography Tips for Stunning Shots
Getting started with nightscape photography can feel like stepping into another world. You’re dealing with low light, unfamiliar camera settings, and the earth’s rotation adds another layer of complexity. However, with the right nightscape photography tips, you can capture stunning images of starry skies and moonlit landscapes that will leave viewers in awe.
In this guide, we’ll explore essential gear you’ll need, including cameras, lenses, tripods, and remote shutter releases. We’ll also cover critical camera settings, such as mastering the 500 rule for sharp stars, adjusting ISO to manage noise, and utilizing wide apertures for breathtaking depth of field. Additionally, we’ll share tips on location scouting to find the best spots for your night photography adventures.
As we delve deeper, you’ll learn how to nail focus on distant stars and enhance your images through post-processing techniques. For those looking to push their skills further, we’ll touch on advanced techniques like capturing star trails and the Milky Way. Ready to elevate your nightscape photography? Let’s uncover the pro techniques that will make your images truly shine under the stars!
Table of Contents:
- Essential Gear for Breathtaking Nightscapes
- Mastering Camera Settings for Nightscape Photography
- Location Scouting for the Best Nightscape Images
- Focus on the Stars: Nailing Focus
- Post-Processing Your Night Photography
- Experimenting With Advanced Nightscape Photography Tips: Star Trails and Milky Way Photography
- FAQs about nightscape photography tips
- Conclusion
Essential Gear for Breathtaking Nightscapes
You won’t get far in the world of nightscape photography without the right tools. Investing in some key pieces of gear can make a significant difference in your results. Here’s what you’ll want in your camera bag:
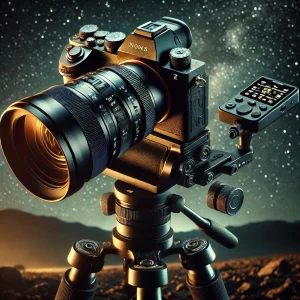
Camera and Lens
While many cameras can handle low-light situations to some extent, a full-frame DSLR or a quality mirrorless camera will generally produce the best outcomes. A full-frame camera sensor excels in these conditions because it gathers more light, resulting in less digital noise and sharper images. They can capture the subtle details in your night images.
Lens choice also dramatically impacts your image quality. Although it might be tempting to stick with the ease of a zoom lens, consider exploring your options. If image quality is a priority for you, it might be time to explore prime lens options. Some prime lenses have incredibly wide apertures, perfect for those dimly lit night scenes. However, if versatility is more your style and you prefer the convenience of carrying one lens instead of two for your nighttime adventures, a high-quality zoom lens might be the ideal fit. One example is the Nikon 17-35mm 2.8.
Tripod
Sharpness is key for night photography. Even the tiniest camera shake will turn stars into blurry streaks instead of those tack-sharp points of light we aim for. A sturdy tripod is non-negotiable when shooting nightscapes. It eliminates camera shake entirely. Plus, don’t underestimate the benefit of having adjustable legs on your tripod—crucial for uneven terrain.
Think back to when you may have seen a photographer with their tripod set up on a windy beach. Minimizing vibrations is absolutely critical, especially during those breezy nights when capturing long exposures. Weighted bags or even your camera bag can make all the difference in keeping things stable in your setup.
Remote Shutter Release
Every time you press the shutter button on your camera, you introduce a tiny amount of vibration. This is amplified in long exposure photography. You can eliminate this issue with a remote shutter release.
Mastering Camera Settings for Nightscape Photography
Selecting the right camera settings can be the difference between an okay photo and a breathtaking masterpiece. These nightscape photography tips for camera settings will get you started:
Shoot RAW
This is non-negotiable for maximizing image quality. Shooting in RAW gives you much more flexibility during post-processing, especially when adjusting things like white balance. RAW files capture significantly more information than JPEGs. They also tend to render colors more accurately at high ISOs, essential when shooting at night.
Go Manual
Auto mode won’t cut it here. Switch to full manual mode. Taking control of your aperture, shutter speed, and ISO is paramount for capturing challenging night scenes. You will be shooting long exposures with varying degrees of ambient light.
Embrace Wide Apertures
Set your lens to its widest aperture to allow the maximum amount of light to hit the sensor. That’s the lowest possible f-number (f/2.8 or lower is perfect.). Wide apertures, when used creatively with nightscape photography techniques, can even produce captivating effects like starbursts. These are where points of light stretch out radially. The ability to leverage those artistic tools effectively often sets apart impactful photography.
Adjusting Shutter Speed Using The 500 Rule
Longer exposures are crucial at night. But because of the Earth’s rotation, stars appear to trail across the sky over time. To prevent blurry stars in your images, a good guideline is the “500 Rule.” Simply divide 500 by the focal length of your lens to get the maximum shutter speed (in seconds) to avoid noticeable star trails. For example, with a 20mm lens, your shutter speed should be 25 seconds or less.
Managing Noise With ISO
ISO controls your camera’s sensitivity to light. Higher ISO values help capture those darker areas of a scene. However, using an unnecessarily high ISO can introduce excessive digital grain. This will degrade your image quality. But there are workarounds to this. For example, some modern cameras offer ISO invariance. That means you can brighten shadows more easily in post-processing, keeping your image cleaner with minimal digital grain or noise.
Here’s a quick reference guide you can save and bring along to your next shoot. Remember that these are starting points and might need adjusting depending on your specific camera and the shooting conditions:
| Situation | Aperture | Shutter Speed | ISO |
|---|---|---|---|
| Bright Nightscapes (well-lit moon, city lights) | f/5.6 – f/8 | 10-30 seconds | 400-800 |
| Milky Way Photography | f/2.8 – f/4 | 15-30 seconds (follow 500 rule) | 1600-3200 |
| Dark Sky Locations (minimal light pollution) | f/2.8 or wider | 20-40 seconds (follow 500 rule) | 3200-6400 |
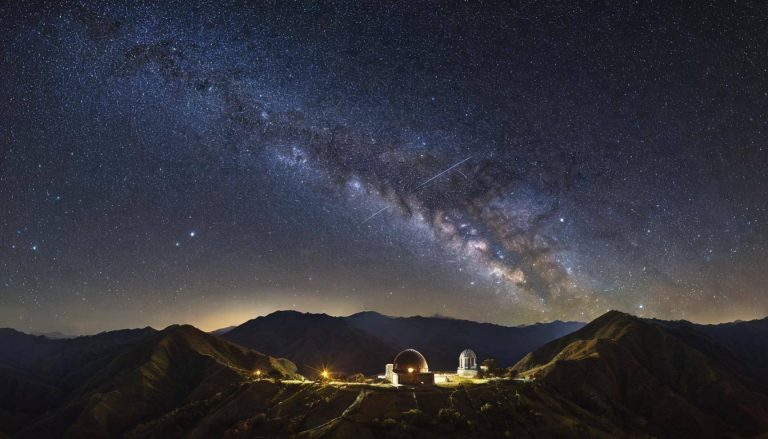
Location Scouting for the Best Nightscape Images
Picking the right location for night photography involves some preparation, especially if you are new to an area. Finding a great place to shoot at night can be tough. Use a light pollution map to find a dark sky site. During daylight, scout your spot and envision potential shots. Getting back safely from a successful nightscape photography session should always be the priority. Make a note of any potential dangers if you’re venturing into the wilderness at night.
Think about compositional elements such as a clear view. Interesting foregrounds, like trees or rock formations, add depth and visual intrigue. A crescent moon can also add a nice element to your composition, as well.
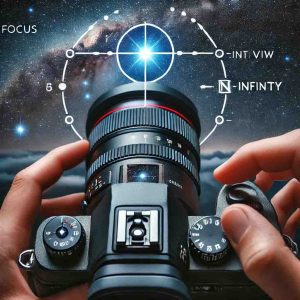
Focus on the Stars: Nailing Focus
Accurate focusing can be tricky at night. Autofocus struggles. Use manual focus instead. Enable Live View, then locate a bright star. Magnify the view. Fine-tune your focus until those stars look razor-sharp. If your lens has a distance scale, marking the “infinity” point with a piece of tape for future reference is a fantastic time saver. This will help if you need to recompose or adjust your framing, so you have a visual indicator of where your lens should be focused for capturing those distant celestial wonders.
Mastering manual focusing takes practice. To up your game even further, try exploring the hyperfocal distance—a more advanced technique. That is the distance you focus your lens to maximize depth of field. In simpler terms, it lets you get more of the scene sharp.
Post-Processing Your Night Photography
Think of post-processing as the darkroom of the digital age. Programs such as Adobe Lightroom or Adobe Photoshop can transform those good raw shots into stunning photos. They allow you to tweak your photos and enhance the existing details, revealing the natural beauty.
Start with Adobe Bridge to import and organize those photos. Next, jump over to Adobe Lightroom. Fine-tune your white balance. Adjust exposure and contrast with precision using curves. This helps control the tonal range within your photo and emphasize highlights or shadows, enhancing textures and forms. You can reduce any noise introduced by high ISO settings by utilizing advanced noise reduction algorithms.
Finally, to edit specific elements of your night photographs or layer exposures, use software like Adobe Photoshop. Mastering image file types and processing is essential to refine those details, but avoid the temptation to over-process. That can leave those images looking artificial and unnatural. Knowing how to work with RAW images is essential for nightscape photography, as they offer more flexibility for adjustments.
Experimenting With Advanced Nightscape Photography Tips: Star Trails and Milky Way Photography
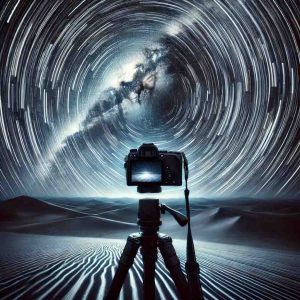
With some experience and basic understanding of camera settings, you can elevate your images. Try different nightscape photography techniques to add more interest. Ready to delve into advanced techniques? One stunning example is capturing star trails. These long exposures showcase the earth’s rotation as those captivating arcs of light. Or what about trying to photograph our galaxy?
Capturing mind-boggling shots of the Milky Way with those ethereal dust lanes stretching across the frame is something many photographers find immensely satisfying. You will want to think through details like location and using the correct settings. You’ll also want to consider using a star tracker. That helps eliminate streaks during long exposures.
FAQs about nightscape photography tips
What if my stars aren’t sharp, even when following the 500 rule?
Several factors beyond just your shutter speed influence sharpness. Consider factors like the quality of your lens. Higher-quality lenses are less susceptible to things like coma—a type of distortion where stars at the edge of your frame appear stretched or comet-like, even if properly focused. This effect tends to occur at wider apertures.
Is a star tracker really necessary for nightscapes?
No, a star tracker is not always needed, especially if capturing the overall beauty of a nightscape is your primary goal. However, if your vision involves revealing intricate details within those star clusters or capturing the Milky Way with minimal noise, then it is a must. A star tracker is an invaluable tool for astrophotographers aiming for that extra level of definition and minimizing trailing over those long exposures.
Shorter exposures also create beautifully detailed images. You can even “stack” those later during image processing, mimicking a long exposure with a star tracker. The Sky-Watcher Star Adventurer is a popular choice. There are even stargazing apps available to help you plan your shoot. These will show you the position of the Milky Way and the brightest stars, among other features. PhotoPills is one example of a great app.
Conclusion
With some effort and careful planning, these nightscape photography tips will have you venturing out after dark to capture breathtaking night photos in no time. Remember, patience is everything—embrace the challenges and enjoy the creative exploration. The light-gathering ability of your camera lens is essential for capturing amazing nightscapes. These nightscape photography tips should help get you pointed in the right direction. Now, get out there and give it a try. You never know, your most captivating shot may be just around the next bend under a blanket of stars or here in Vilcabamba.